Upload a dump ⬆️
timestamp1691677208810
Importing a dump with Meilisearch is now easier than ever. You can effortlessly import all your Meilisearch indexes, documents, and settings to your new Cloud project via the Meilisearch Cloud UI.
Follow these steps:
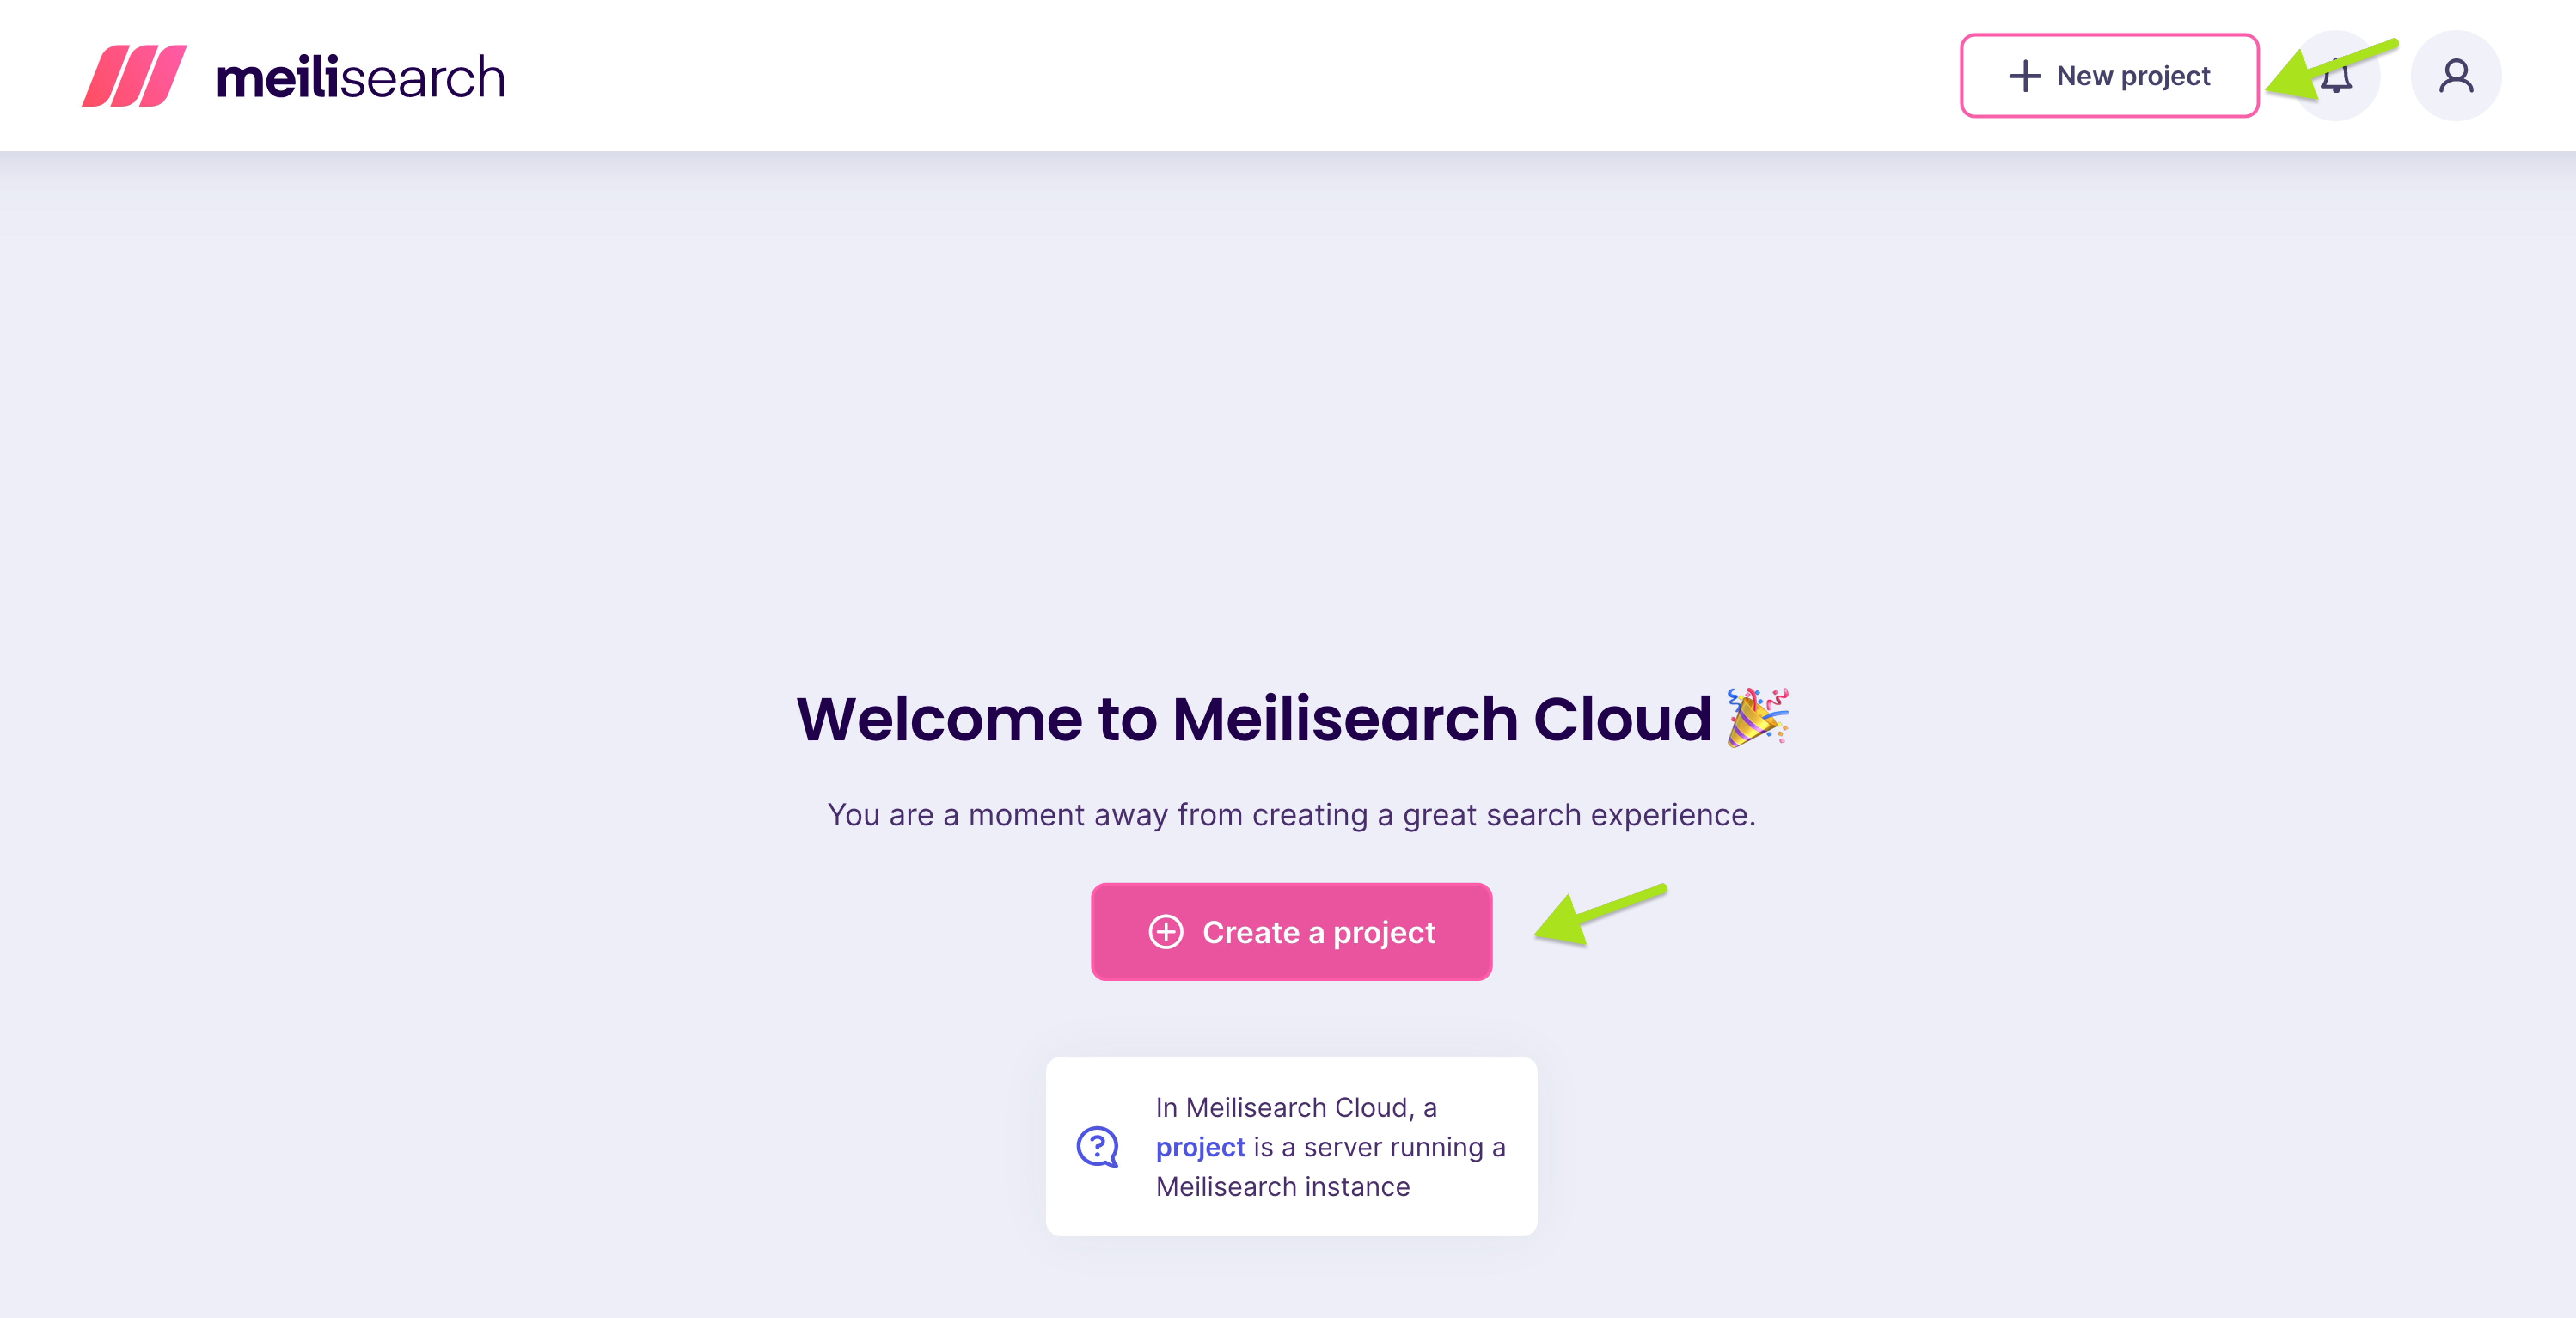
1. Creating a project
Before importing a dump, you must first create a new project.
👉 If you're unfamiliar with creating a dump, you can learn how in the documentation's dedicated section.

2. Importing a dump
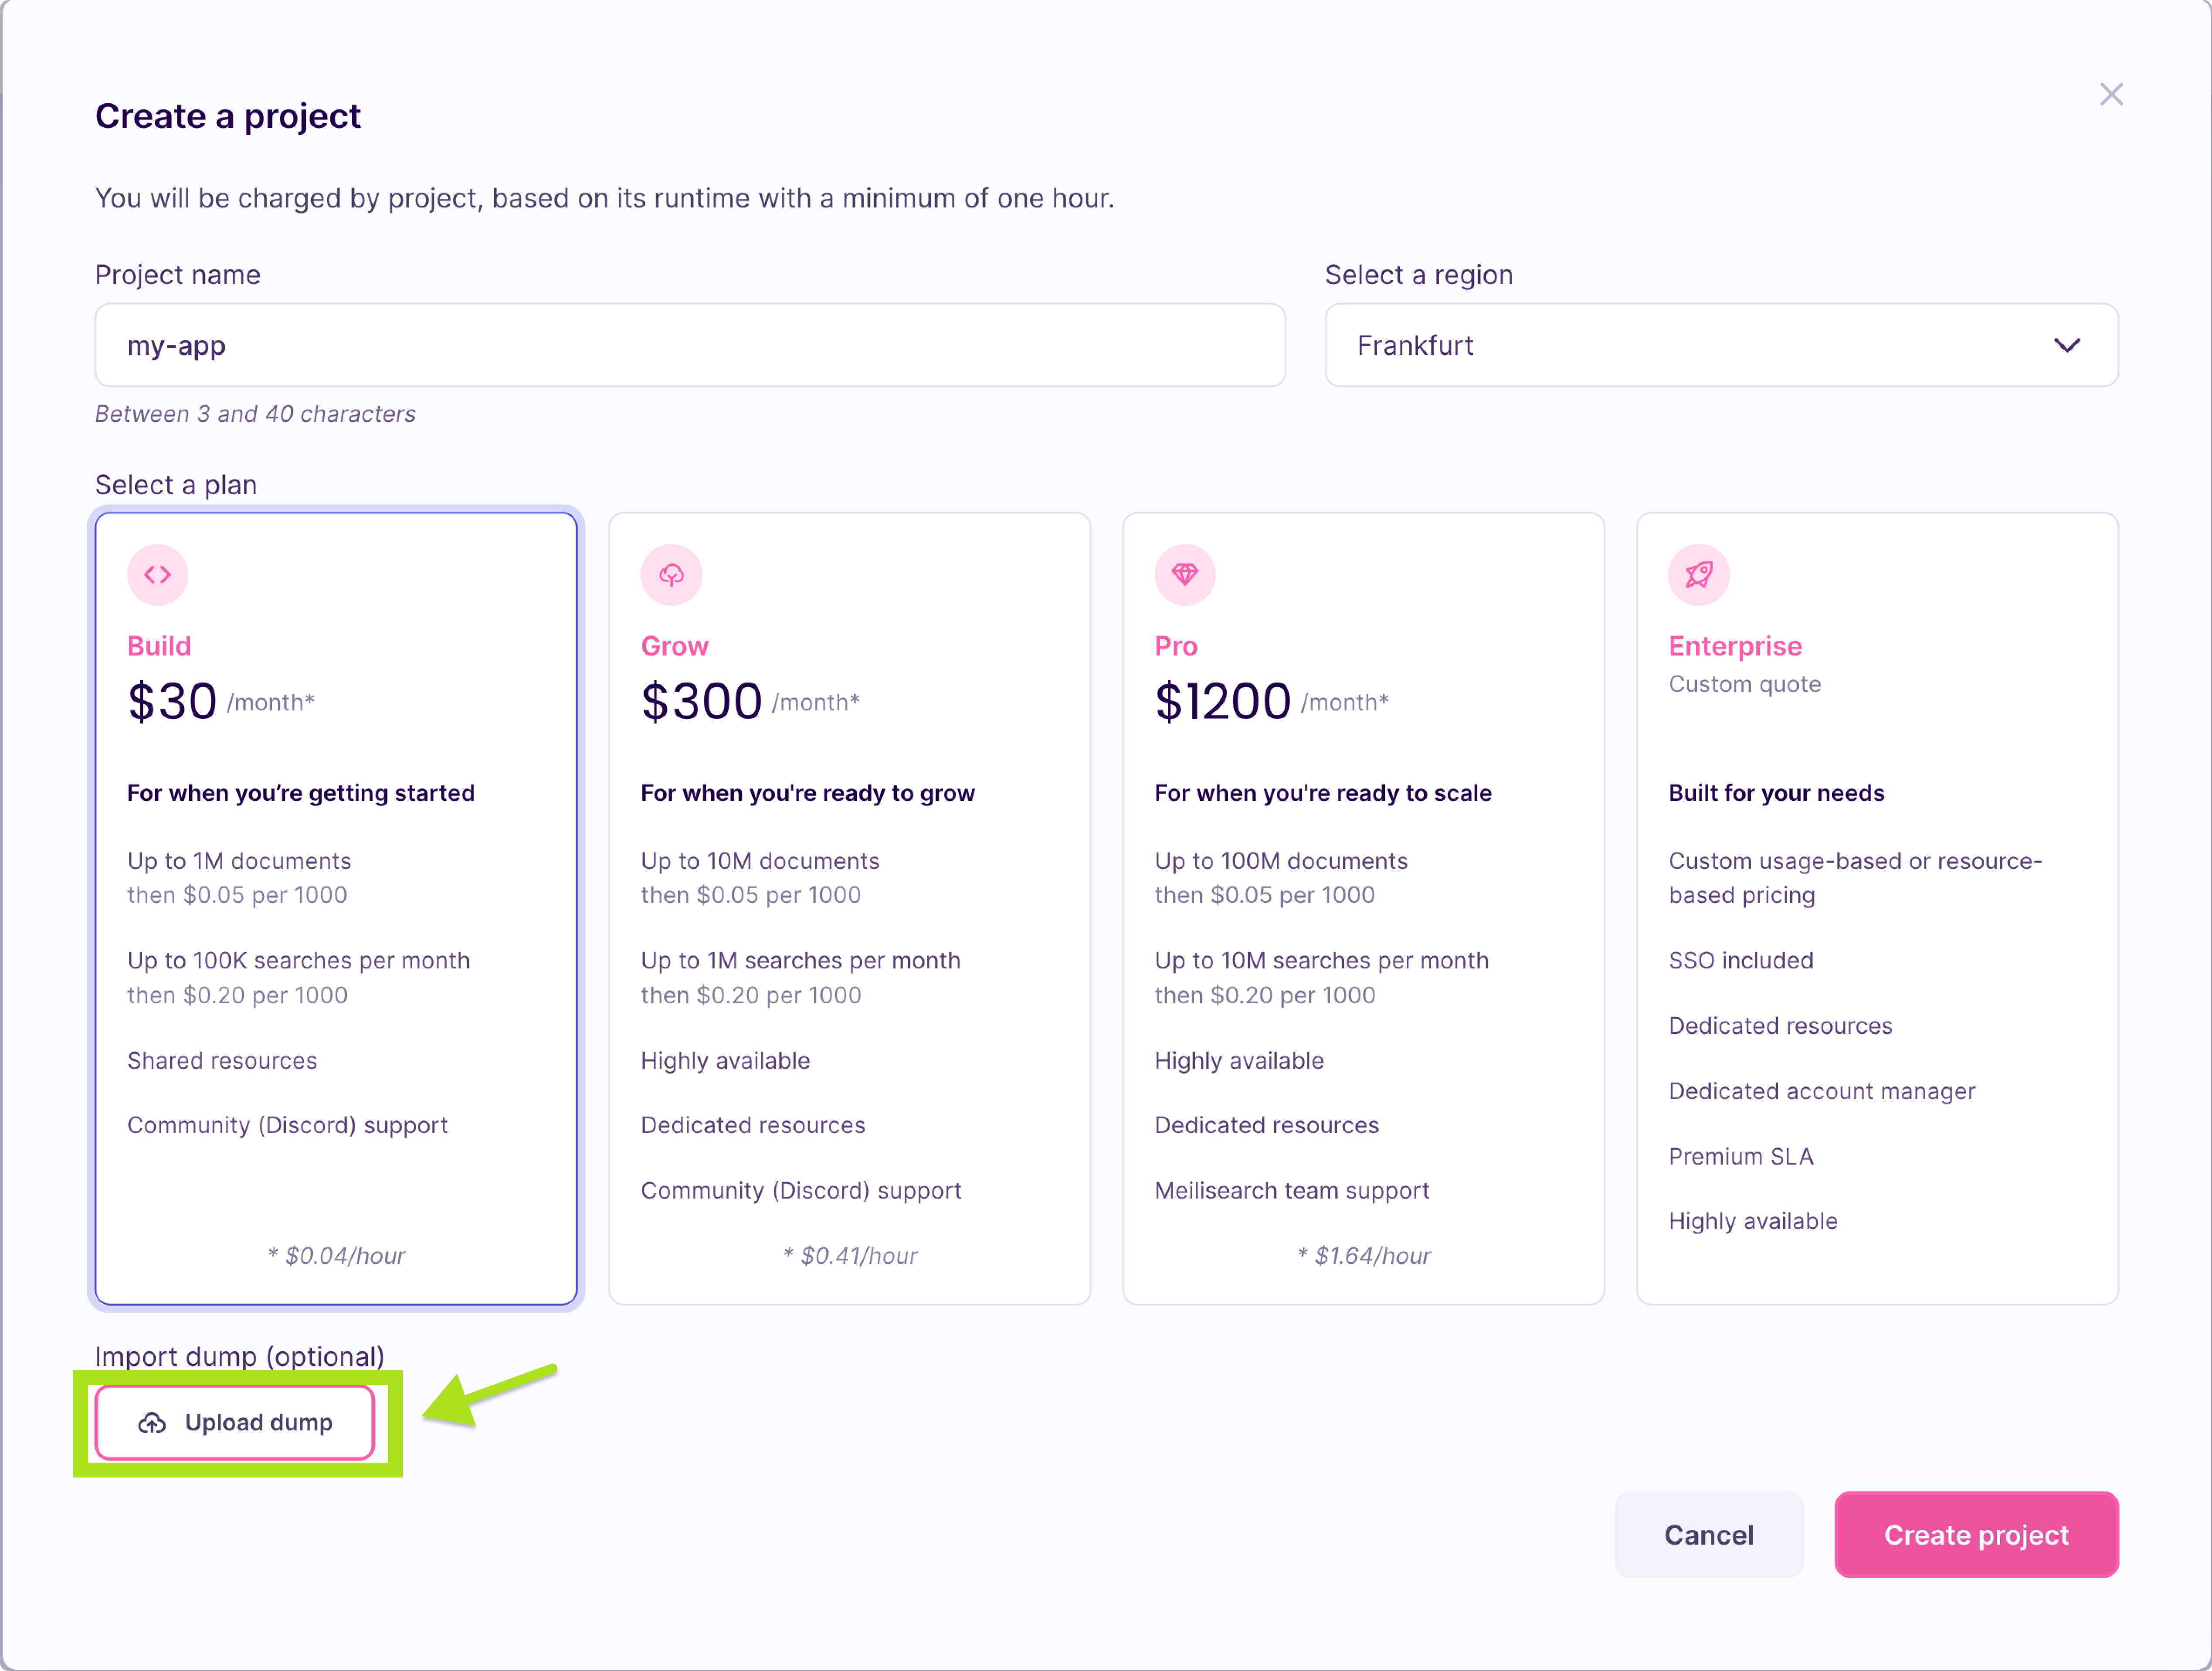
Once you click the button to create a new project, a form will appear that invites you to provide the project information.
Enter the required details for your project, including the project name and the region where it will be hosted.
Look for the Upload dump button on the bottom left of the form.

Click this button to browse your files and upload your desired dump file.
👉 The default dumps folder is named
dumps, located in the same directory as your Meilisearch binary, unless you specified a different directory when launching your Meilisearch instance.
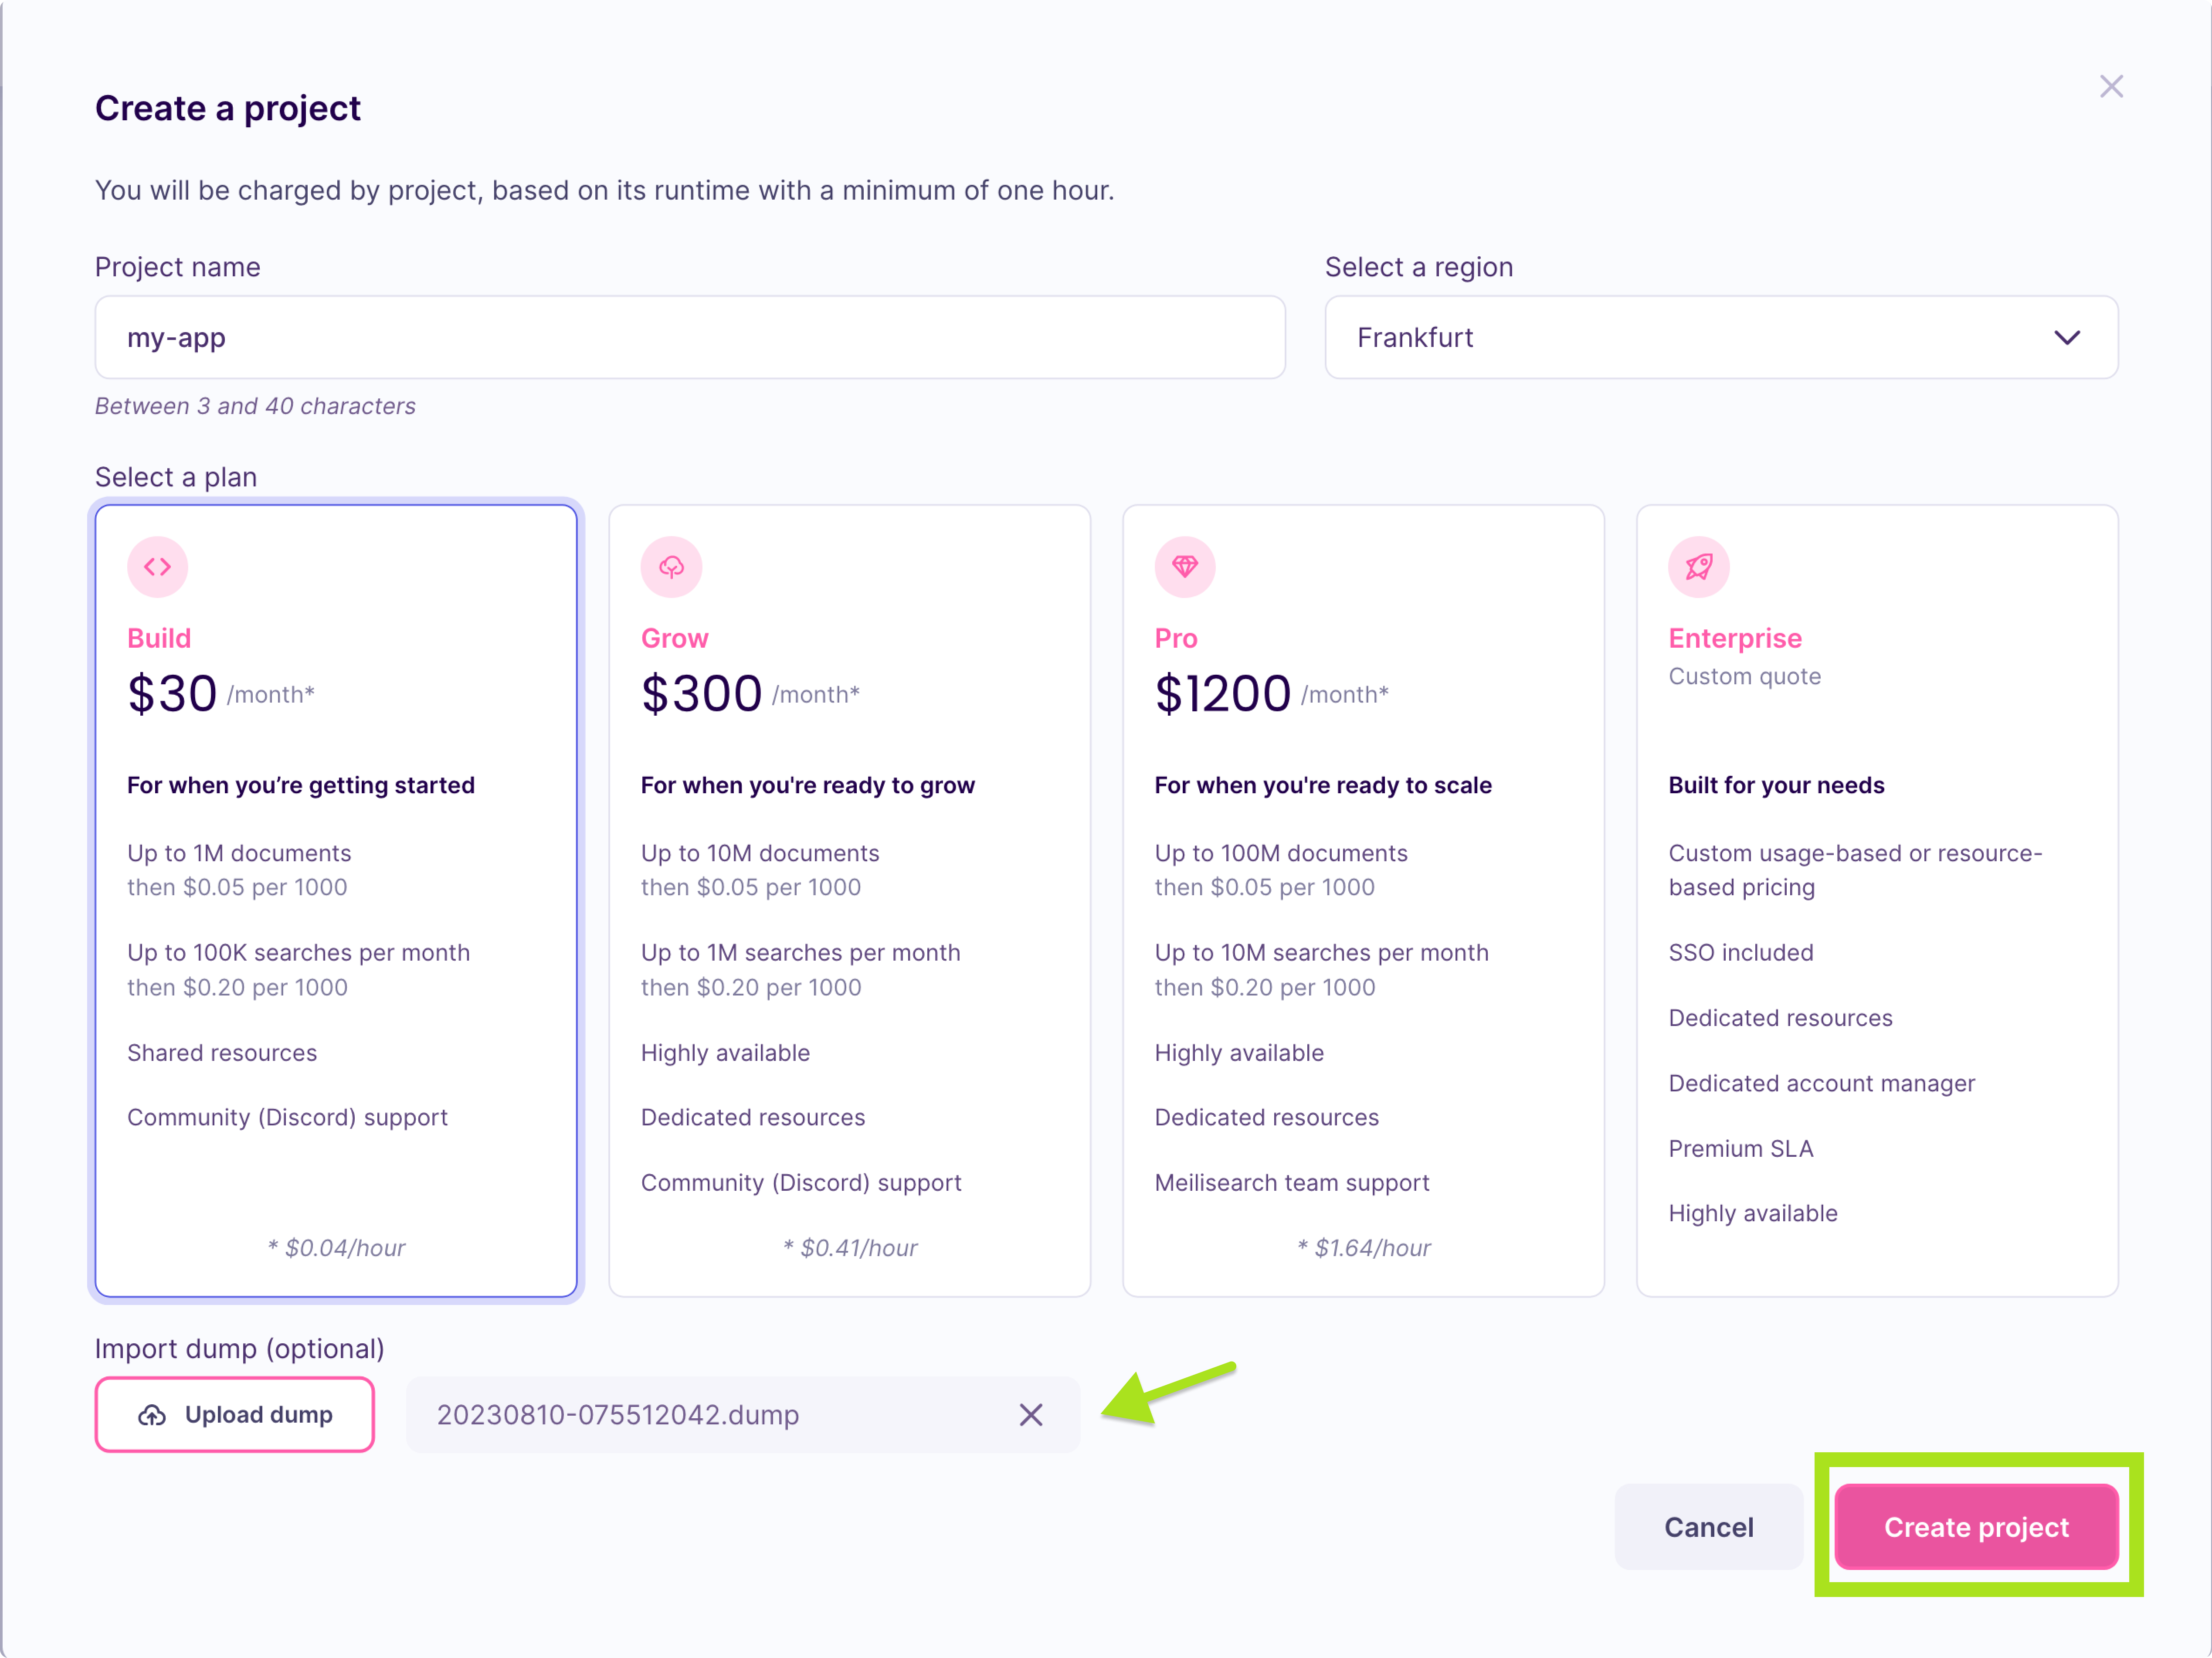
Once you've selected the dump file, its name should appear next to the button. Click the Create project button to proceed.

3. Accessing your indexes
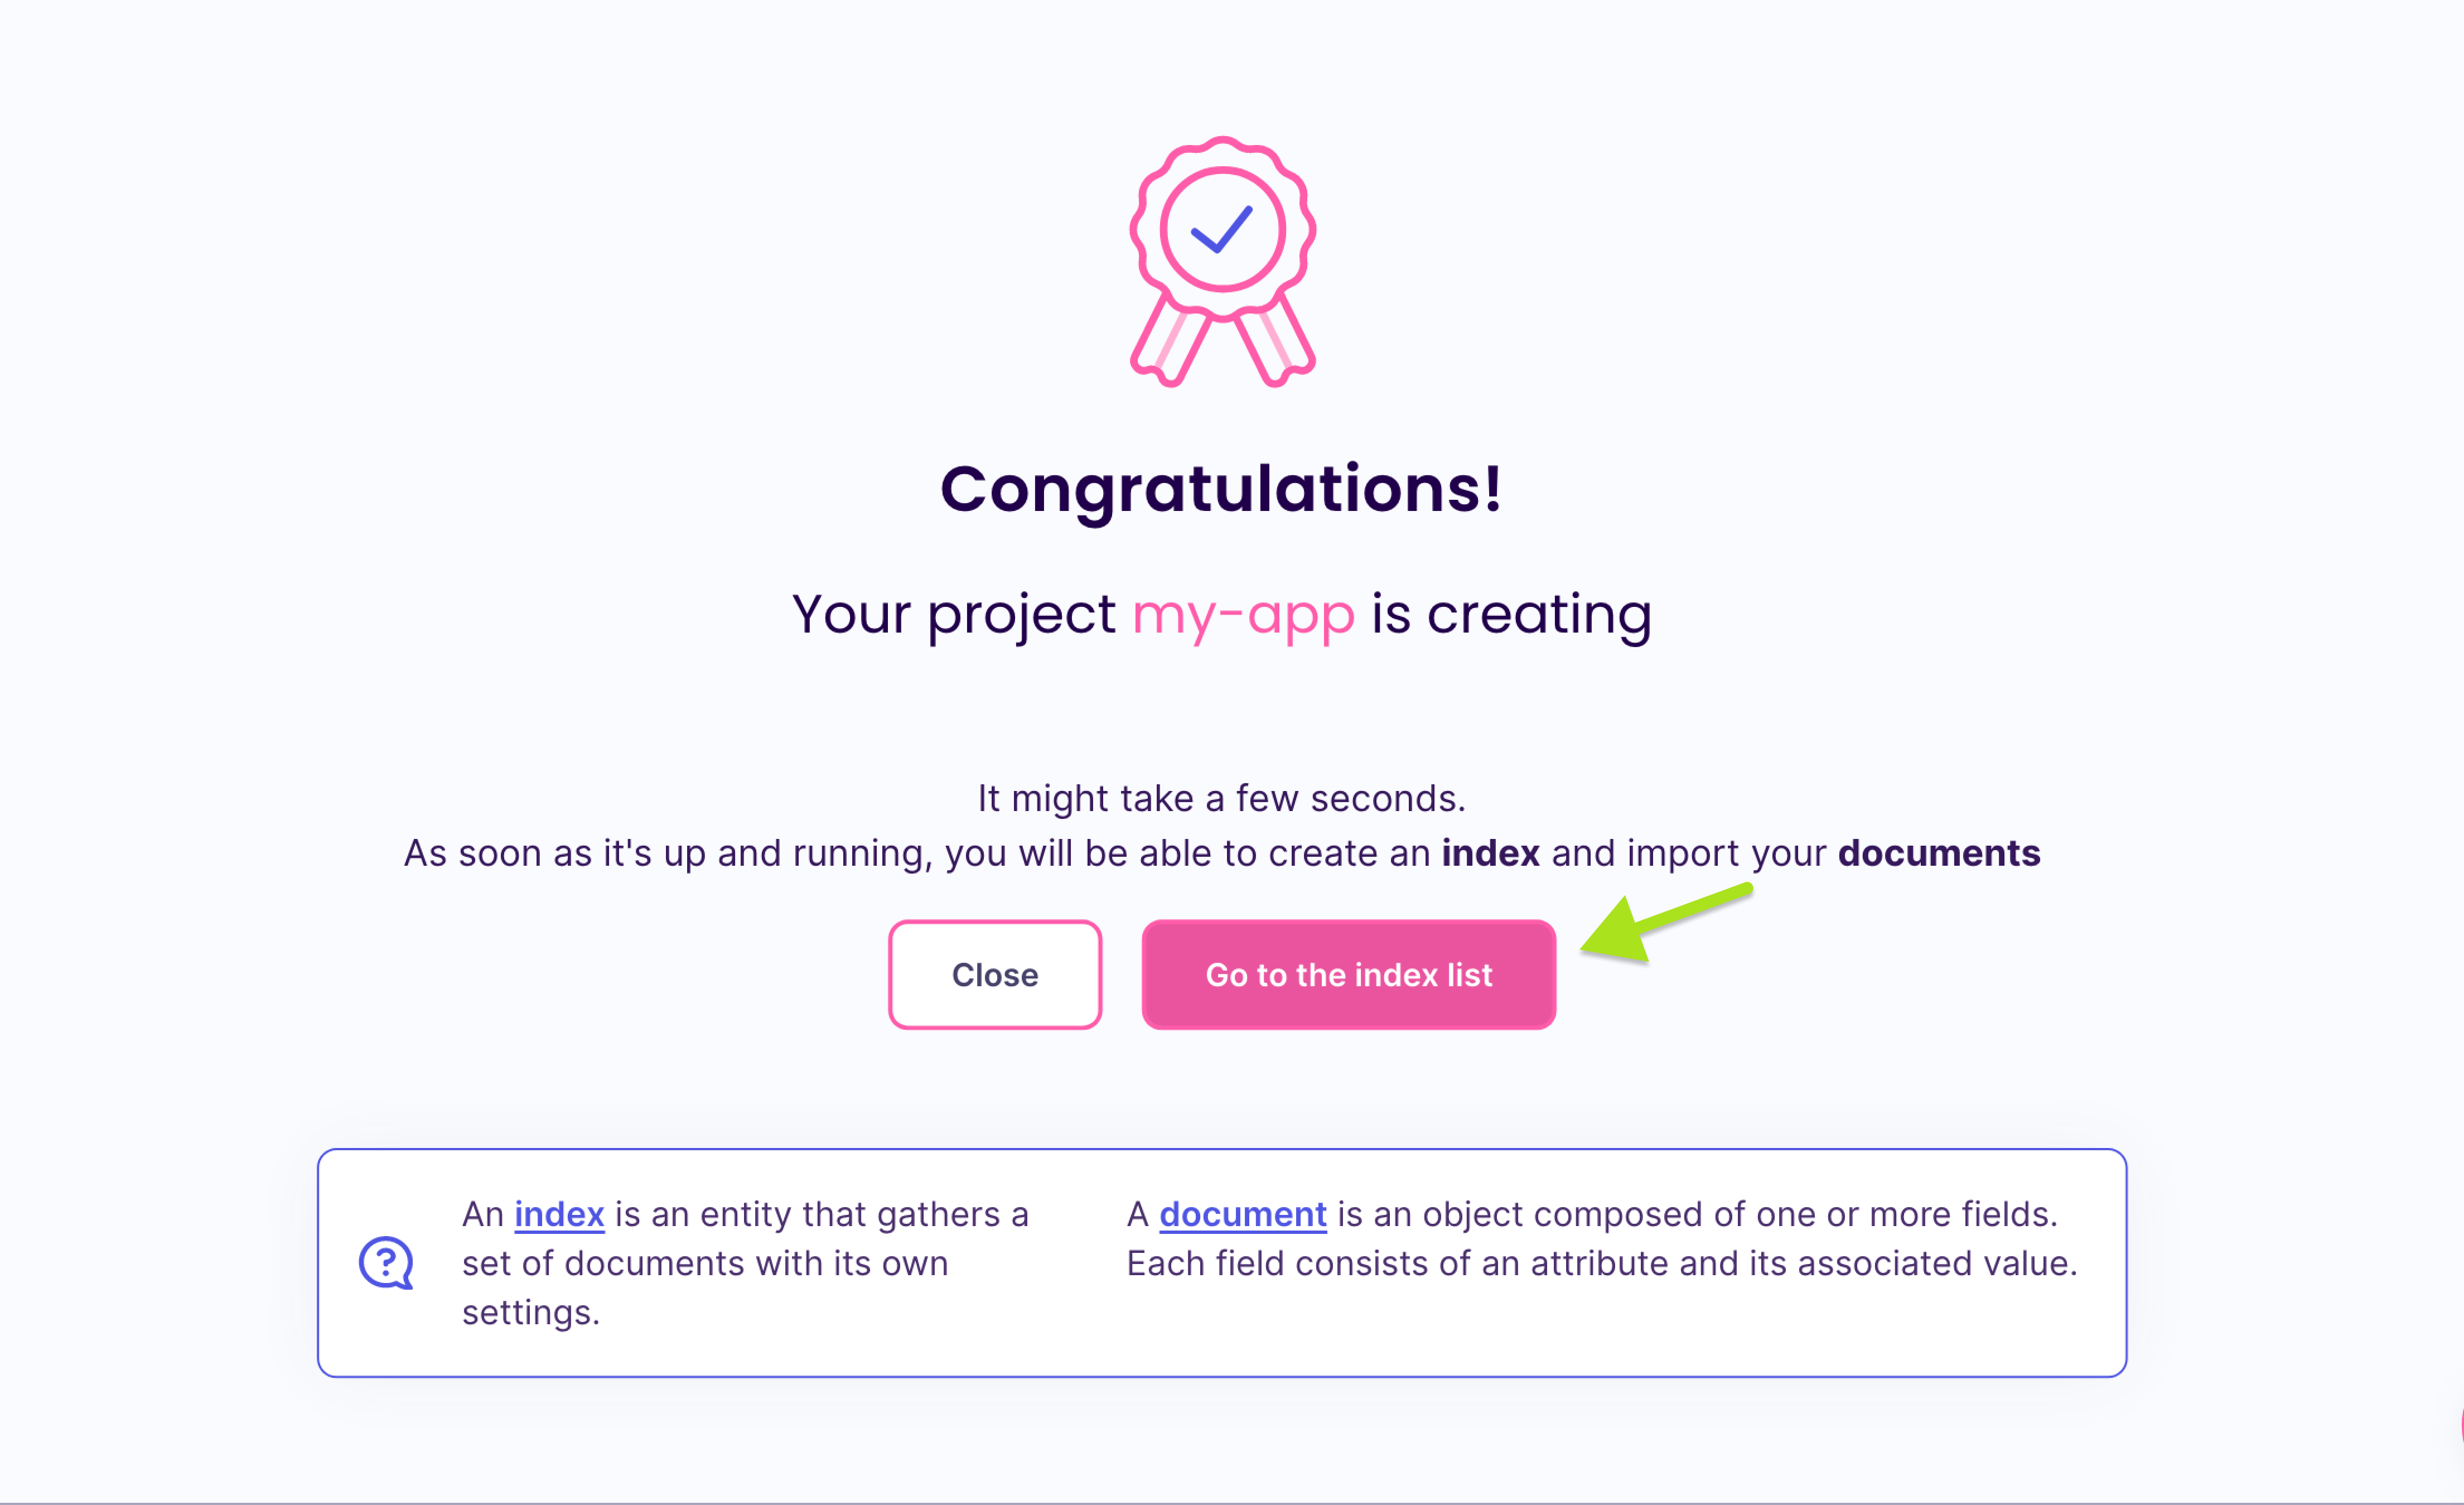
After a few seconds, you'll see a message notifying you that your project is being created. Click the Go to the index list button to view and manage your indexes.

You can now manage your project and start searching.

And that's it! You've now successfully imported a dump into your new Meilisearch Cloud project!
Did you like this update?
![]()
![]()
![]()
Leave your name and email so that we can reply to you (both fields are optional):
